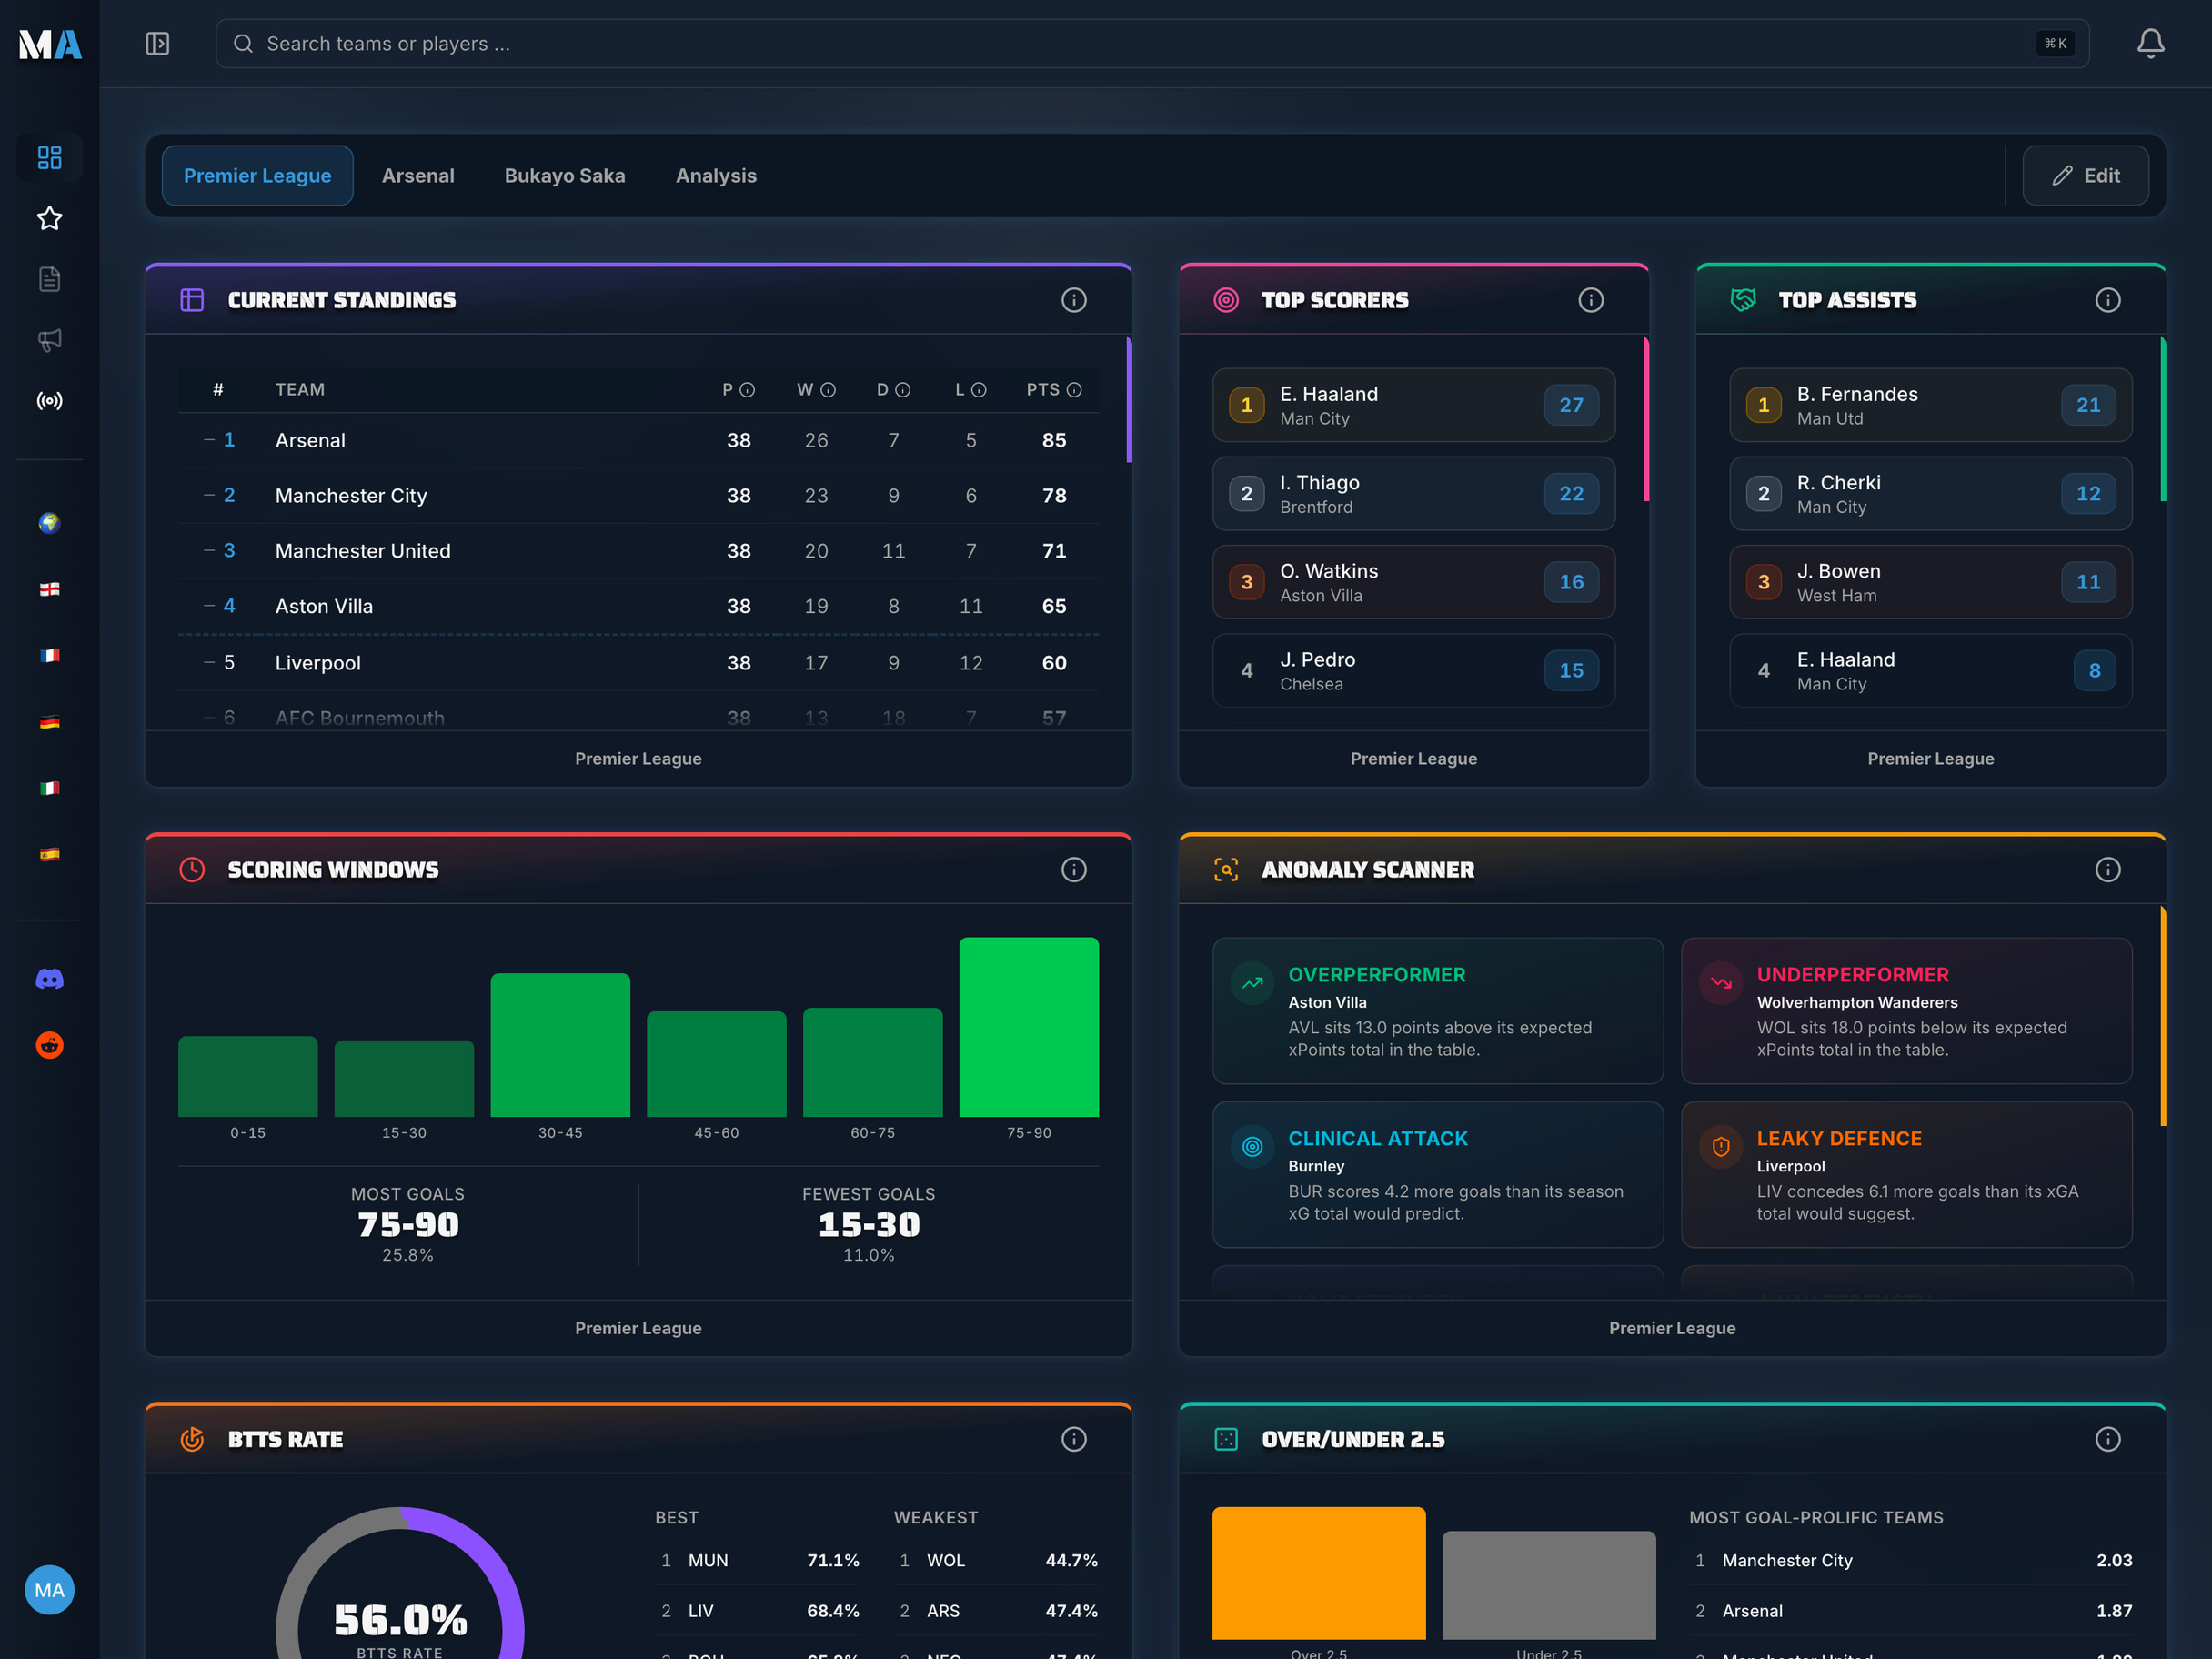
Most player ratings treat a goalkeeper and a striker by the same criteria. The Player MA-Score doesn't. Every player is rated within their own position group, against peers who do the same job - so a 72 for a defensive midfielder means something completely different from a 72 for a winger, and both numbers are fully explainable.
What is the Player MA-Score?
The Player MA-Score is a composite rating on a 0-100 scale that measures how a footballer is performing relative to other players in the same position group within the same league. A score of 50 is always the position median - not an arbitrary midpoint, but the actual statistical median of all players in that group. Half score above 50, half below.
Unlike match ratings from SofaScore or FotMob - which rate a single game on a 1-10 scale and reset after every fixture - the Player MA-Score is a season-long assessment. It is updated daily and reflects a player's accumulated performance across all matches played in the current campaign.
The score is built on the same mathematical foundation as the Team MA-Score: per-90 normalisation, Z-score standardisation, and CDF transformation. Both the Team MA-Score and the Player MA-Score now share the same five-dimension structure - Attacking Threat, Ball Progression, Defensive Solidity, Efficiency, and Form - adapted to the context of individual players rather than whole teams. For goalkeepers, the Attacking Threat dimension is replaced by Shot Stopping, which captures save quality, xG prevention, and penalty saves instead. The Player MA-Score adds one further layer the team score doesn't need: strict position separation. A goalkeeper is never compared to a centre-back. A striker is never compared to a central midfielder. The peer group for each comparison is always players doing the same job in the same league.
Why Position-Specific? The Case for Separation
Consider what a generic player rating would look like. A goalkeeper who plays 90 minutes and makes 6 saves, records 0 goals, 0 assists, and 0 shots on target has done an excellent job - but a generic system that weights goals and assists heavily would give them a mediocre score. A striker who scores 2 goals from 1.1 xG has been clinical, but a system evaluating pass accuracy and defensive work rate would undervalue their contribution.
The problem is fundamental: different positions have different jobs. Comparing them with a single metric set is like evaluating a surgeon and a pilot by the same performance criteria. Both are skilled professionals, but success looks completely different for each.
MatchAnalyzr solves this by defining eight position groups with separate metric sets and weights. The groups are:
- GK: Goalkeeper
- CB: Centre-Back
- FB: Full-Back (left and right)
- DM: Defensive Midfielder
- CM: Central Midfielder
- AM: Attacking Midfielder
- WAM: Wide Attacker / Winger
- ST: Striker
Each group uses only the metrics that are meaningful for that role. The weights within each group reflect the relative importance of each metric to overall performance in that position. A striker's score is dominated by goals, xG, and shooting efficiency. A defensive midfielder's score is dominated by duel win rate, passing accuracy, and tackles. The two players are never compared to each other.
The Eight Position Groups in Detail
Each position group has its own metric set, carefully selected to capture what genuinely matters for that role. All groups share the five-dimension structure (Attacking Threat, Ball Progression, Defensive Solidity, Efficiency, Form), with metrics assigned to the most appropriate dimension per position. For goalkeepers, Attacking Threat is replaced by Shot Stopping. Below is a full breakdown of the key metrics and weights used for each group.
Goalkeepers share the same five-dimension structure as all other position groups, with one substitution: the Attacking Threat dimension is replaced by Shot Stopping, which is the goalkeeper equivalent. Shot Stopping evaluates save quality, xG prevention, and penalty performance - the metrics that genuinely define a goalkeeper's contribution.
- Save Percentage (30%): The proportion of shots on target that are saved. The most direct measure of shot-stopping quality.
- xG Prevented per 90 (30%): xGA minus actual goals conceded, per 90 minutes. A positive number means the goalkeeper is saving more than the average keeper would against equivalent chances - the purest measure of goalkeeper value above replacement.
- Clean Sheet Percentage (20%): The proportion of matches in which zero goals were conceded. Requires a complete defensive performance, not just individual saves.
- Penalty Save Percentage (20%): Penalties are a high-leverage situation. A goalkeeper who saves penalties at above-average rates provides measurable value in matches that can otherwise be decided by chance.
Example: A goalkeeper with 72% save percentage, +0.18 xG Prevented per 90, 38% clean sheets, and 2 penalties saved from 5 faced would comfortably sit in the upper half of their league's goalkeeper group.
CB - Centre-Back
Centre-backs are evaluated on their ability to prevent dangerous situations, win duels, and recycle possession under pressure. Defensive Solidity is the heaviest-weighted dimension for CBs (35% of the overall score) and is built from six metrics.
- Duels Won % (20%): The proportion of ground-level defensive challenges won - tackles, shoulder-to-shoulder battles, and challenges in one-on-one situations.
- Times Dribbled Past per 90 (20%, inverted): How often opposing attackers beat the centre-back on the dribble. Inverted so that fewer times beaten produces a higher score - a direct measure of defensive reliability in isolation.
- Tackles per 90 (15%): Successful defensive tackles. A CB's first-line proactive defensive action.
- Interceptions per 90 (15%): Reading the game and cutting out passes before they reach their target. A strong indicator of positional awareness.
- Clearances per 90 (15%): How often the defender clears the ball from dangerous areas. The last line of defence before a chance is created.
- Blocks per 90 (15%): Shots blocked in the box. A measure of bravery, positioning, and active defending in the most dangerous zones.
Beyond Stability, centre-backs are also evaluated on Efficiency (25%), which pairs Duels Won % and Pass Accuracy %, and on Ball Progression (15%), which rewards the ability to play out from the back through accurate long balls, through balls, and overall pass accuracy.
Example: A centre-back winning 61% of ground duels, being dribbled past just 0.4 times per 90, recording 2.1 tackles, 2.8 interceptions, 6.4 clearances, and 1.8 blocks per 90 would rank among the stronger performers in their league's CB group.
FB - Full-Back
Full-backs in the modern game are expected to contribute at both ends of the pitch. Their dimension weights reflect this dual responsibility - Attacking Threat (15%), Ball Progression (25%), Defensive Solidity (25%), Efficiency (20%), and Form (15%) are spread more evenly than for any other outfield position.
The Defensive Solidity dimension (25%) is built from five metrics:
- Duels Won % (25%): Defending against wingers is the primary defensive challenge for a full-back.
- Tackles per 90 (20%): Proactive defensive actions.
- Interceptions per 90 (20%): Anticipatory defending - reading the pass rather than reacting to the dribble.
- Times Dribbled Past per 90 (20%, inverted): Direct measure of how often attackers get past the full-back in isolation.
- Crosses Blocked per 90 (15%): Preventing delivery into the box from wide areas.
Ball Progression (25%) rewards key passes per 90 (23%), successful dribbles percentage (23%), assists per 90 (18%), pass accuracy (18%), and long balls (18%). Efficiency (20%) combines dribble success percentage (34%), pass accuracy (33%), and duels won percentage (33%).
Example: An attacking full-back winning 58% of ground duels, being dribbled past just 0.5 times per 90, delivering 1.9 key passes, 3.4 successful dribbles, with 84% pass accuracy would be a strong performer in most leagues' FB group.
DM - Defensive Midfielder
Defensive midfielders are the engine room between defence and attack. Their score heavily rewards protecting the back line and distributing intelligently, with Defensive Solidity at 30% and Ball Progression at 25% of the overall score.
The Defensive Solidity dimension is built from five metrics:
- Duels Won % (26%): The ability to win midfield battles - the defining defensive quality for a DM.
- Errors Leading to Goal (20%, inverted): Direct errors that resulted in a goal conceded. A DM who loses the ball in central midfield positions creates the most dangerous defensive exposure on the pitch - this metric is inverted so fewer errors produce a higher score.
- Tackles per 90 (18%): Proactive ball-winning actions.
- Interceptions per 90 (18%): Reading the game to cut out passes before they develop into chances.
- Fouls Committed per 90 (18%, inverted): Fouls concede free-kicks and risk cards. Inverted so that disciplined defending produces a higher score.
Ball Progression (25%) emphasises pass accuracy (28%), key passes per 90 (26%), long balls (23%), and through balls (23%). A DM who only recycles possession without ever creating chances cannot reach the top of the group.
Example: A DM winning 62% of midfield duels, with just 0.1 errors leading to goals per 90, 3.4 tackles, 2.9 interceptions, 91% pass accuracy, and 1.8 key passes per 90 would be an elite-level performer in most leagues.
CM - Central Midfielder
Central midfielders are evaluated on a balance between creative output and defensive contribution, reflecting the demands of a box-to-box role. Ball Progression carries the heaviest weight for this position group (30%).
The Ball Progression dimension is built from five metrics:
- Assists per 90 (27%): The end product of ball progression - passes that directly produced goals.
- Key Passes per 90 (22%): Passes that directly create shots. A CM's primary creative output.
- Pass Accuracy % (17%): Accuracy in possession reflects both technical quality and decision-making. Errors in central midfield are often immediately exploited.
- Through Balls per 90 (17%): Defence-splitting passes that break lines.
- Big Chances Created per 90 (17%): High-xG chances produced by the player - a stricter measure than key passes that filters for real goal opportunities.
Defensive Solidity (20%) rewards tackles per 90 (25%), interceptions per 90 (25%), duels won percentage (29%), and penalises errors leading to goals (21%, inverted). Attacking Threat (20%) combines big chances created, goals, assists, shots, and xG - a CM who threatens the box as well as creating for teammates gets rewarded.
Example: A CM registering 2.3 key passes per 90, 0.35 assists, 88% pass accuracy, 1.2 through balls, and 0.9 big chances created per 90 would be a comfortably above-average performer in the CM group.
AM - Attacking Midfielder
Attacking midfielders are evaluated almost entirely on creative and offensive output. Their defensive metrics carry minimal weight (Defensive Solidity at 10%) because their primary job is to generate and score goals. Attacking Threat is weighted at 30%, Ball Progression at 30%.
Attacking Threat is built from six metrics:
- Goals per 90 (28%): The end product of an AM's offensive activity.
- Assists per 90 (20%): Direct involvement in teammates' goals.
- xG per 90 (17%): The underlying quality of the shooting positions the AM gets into.
- Shots on Target per 90 (13%): Testing the goalkeeper consistently.
- Big Chances Missed per 90 (12%, inverted): Clear-cut chances squandered. Inverted so fewer misses produce a higher score.
- Shots Total per 90 (10%): Overall shooting volume.
Ball Progression (30%) rewards key passes per 90 (20%), big chances created (20%), assists (25%), through balls (10%), and successful dribble percentage (25%). The AM profile rewards creators who also finish.
Example: An attacking midfielder scoring 0.42 goals per 90, recording 0.35 assists, 0.38 xG, 1.6 shots on target, and 2.1 successful dribbles per 90 would rank among the top AMs in most European leagues.
WAM - Wide Attacker / Winger
Wide attackers are evaluated on their ability to create from wide areas - through dribbling, key passes, and direct goal threat. Attacking Threat is weighted at 30%, Ball Progression at 25%.
Attacking Threat is built from six metrics:
- Goals per 90 (28%): The end product of wide attacking play.
- Assists per 90 (20%): Direct chance conversion into goals for teammates.
- xG per 90 (17%): Quality of the shooting positions the winger gets into, often from cutting in from wide areas.
- Shots on Target per 90 (15%): Testing the goalkeeper consistently.
- Shots Total per 90 (10%): Overall shooting volume.
- Successful Dribbles per 90 (10%): Beating defenders in wide areas creates overloads and draws fouls in dangerous positions.
Ball Progression (25%) emphasises assists (29%), successful dribble percentage (29%), key passes (24%), and big chances created (18%). A winger who can beat their marker and then pick the right pass is the most valuable profile in this group.
Example: A winger scoring 0.48 goals per 90, 0.30 assists, 0.38 xG, 1.9 shots on target, and 3.1 successful dribbles per 90 would be a highly effective wide attacker by the WAM metric set.
ST - Striker
Strikers are judged primarily on their ability to get into good positions, shoot accurately, and score goals. The metric set is the most offensively concentrated of all eight groups - Attacking Threat alone is weighted at 35%.
Attacking Threat is built from seven metrics:
- Goals per 90 (25%): The most direct measure of a striker's output. Scoring is what strikers are paid to do.
- xG per 90 (20%): A striker who consistently gets into high-quality positions is doing their job correctly, even before considering finishing. xG captures sustainable goalscoring quality.
- Penalty Scored per 90 (15%): Reliable penalty takers convert high-leverage situations that often decide matches.
- Shots on Target per 90 (12%): Testing the goalkeeper consistently generates rebounds and forces errors.
- Shots Total per 90 (10%): Overall shooting volume.
- Big Chances Missed per 90 (10%, inverted): Clear-cut chances squandered. Inverted so fewer misses produce a higher score.
- Hit Woodwork per 90 (8%): Shots that struck the post or crossbar - near-goals that speak to shot quality even when they did not result in a goal.
Efficiency (25%) rewards shots on target, big chances created, penalty scored, and dribble success percentage equally. Defensive Solidity and Ball Progression carry minimal weight for strikers - their job is to score, and the score reflects that clearly.
Example: A striker scoring 0.62 goals per 90, generating 0.55 xG, adding 0.18 penalties scored, hitting the target 1.9 times, with just 0.1 big chances missed per 90 would be an elite striker by the MA-Score system - and the 'Why?' breakdown would show exactly that.
Position-Specific Metrics: The Complete Breakdown
Every position group uses a different set of metrics with different weights. This section documents the complete metric configuration for all eight groups across the five dimensions. All metrics are normalised to per-90 minutes before any comparison is made. Understanding which metrics drive each position's score - and why - is the key to reading the 'Why?' breakdown correctly.
The five dimensions apply to every position group, but the metrics assigned to each dimension differ by role. Weights within each group reflect the relative importance of that aspect to overall performance in that position. For example, Attacking Threat carries 35% of a striker's score but only 10% of a centre-back's.
**Goalkeepers (GK) - the exception: Shot Stopping replaces Attacking Threat**
For goalkeepers, the Attacking Threat dimension is replaced entirely by Shot Stopping. This is the only position group with a structural dimension substitution. Shot Stopping combines saves per 90, saves inside the box, penalty saves, goals conceded (inverted), and clean sheets. The Efficiency dimension for GK uses clean sheets and pass accuracy rather than save metrics to avoid double-counting the same performance signals already captured in Shot Stopping.
**Centre-Backs (CB) - Defensive Solidity weighted at 35%**
Centre-backs are weighted heavily toward Defensive Solidity, built from duels won percentage, times dribbled past (inverted), tackles, interceptions, clearances, and blocks - a six-metric set that captures every core defensive action. Ball Progression captures pass accuracy, long balls, and through balls - reflecting the modern expectation that centre-backs initiate attacks from deep. Efficiency pairs duels won percentage with pass accuracy. Attacking Threat (10%) rewards goals and headers from set pieces through aerials won and xG.
**Full-Backs (FB) - the most balanced profile**
Full-backs have the most evenly distributed dimension weights among outfield positions, reflecting their dual attacking and defensive role. Attacking Threat captures goals, assists, and big chances created. Defensive Solidity captures duels won percentage, tackles, interceptions, crosses blocked, and times dribbled past (inverted). Ball Progression captures key passes, dribble success percentage, assists, pass accuracy, and long balls. No single dimension dominates the FB score.
**Defensive Midfielders (DM) - Defensive Solidity and Ball Progression equally weighted**
DMs are scored primarily on duels won percentage (26% of the Defensive Solidity dimension), tackles, interceptions, and pass accuracy. Errors leading to goals per 90 appears as an inverted metric - midfielders whose mistakes lead directly to goals are penalised heavily, because errors in central midfield create the most dangerous defensive exposure on the pitch. Fouls committed per 90 is also inverted, rewarding disciplined defending.
**Central Midfielders (CM) - creative and defensive balance**
CMs share the errors-leading-to-goal (inverted) stability metric with DMs. The creative dimension is captured through assists per 90 (27%, the single highest-weighted Ball Progression metric for CMs), key passes per 90, pass accuracy, through balls, and big chances created. Defensive Solidity is built from tackles, interceptions, duels won percentage, and the errors-leading-to-goal penalty. The CM profile rewards box-to-box contribution rather than specialists.
**Attacking Midfielders (AM) - Attacking Threat weighted at 30%, goals and assists central**
AMs are scored on goals, assists, xG, shots on target, shots total, and big chances missed (inverted). Ball Progression (30%) rewards key passes per 90, big chances created, assists, through balls, and dribble success percentage. Defensive Solidity carries minimal weight (10%) and rewards duels won percentage, tackles, and rewards holding the ball by inverting times dispossessed.
**Wide Attackers / Wingers (WAM) - Attacking Threat weighted at 30%**
WAMs combine direct goal threat with creative output. Attacking Threat captures goals, assists, xG, shots on target, shots total, and successful dribbles. Ball Progression rewards assists, dribble success percentage, key passes, and big chances created. Efficiency (20%) combines dribble success percentage, pass accuracy, and shots on target - wingers whose quality shows up in both creation and shooting.
**Strikers (ST) - Attacking Threat weighted at 35%, goals at the core**
Strikers have the most offensively concentrated metric set. Goals per 90 carries the highest single-metric weight in the Attacking Threat dimension for ST. xG per 90, penalty scored per 90, shots on target per 90, shots total per 90, big chances missed (inverted), and hit woodwork round out the seven-metric Attacking Threat set. Defensive Solidity (10%) and Ball Progression (15%) carry minimal weight for strikers - their job is to score, and the score reflects that clearly.
Dimension weight ranges across position groups:
- Attacking Threat: from 10% (CB) to 35% (ST)
- Defensive Solidity: from 10% (AM, WAM, ST) to 35% (CB)
- Ball Progression: from 15% (CB, ST) to 30% (CM, AM)
- Efficiency: from 10% (GK) to 25% (CB, ST)
- Form: 10%–15% across all groups
Every weight listed here is the default configuration. All weights are stored in the database and can be adjusted by administrators through the Admin Panel without requiring a code deployment.
Per-90 Normalisation and Playing Time Adjustment
All player metrics are normalised to a per-90-minutes basis before any comparison is made. The formula is straightforward: metric value / (minutes played / 90). A striker who scores 8 goals in 1,260 minutes (14 full matches) has a goals-per-90 rate of 0.57 - the same as a striker who scores 4 goals in 630 minutes. Both players are producing at the same rate; the normalisation ensures they're rated equally.
This is essential because footballers play varying amounts of time. Rotation players, substitutes, players returning from injury, and players who have been rested all accumulate fewer raw statistics - not because they're performing worse, but because they're playing less. Per-90 normalisation strips this out and makes performance rates comparable across all players regardless of their role in squad rotation.
The Minimum Threshold: 270 Minutes
Statistical reliability requires a minimum sample size. A player who has played two complete matches has too small a sample for their per-90 metrics to be stable - a single outstanding performance or a single bad game would dominate the calculation and produce a score that doesn't reflect true ability.
The MA-Score requires a minimum of 270 minutes played (approximately 3 full matches) before a score is shown. Players below this threshold display 'Insufficient data' rather than a potentially misleading number. This is the transparent, honest approach - it's better to show no score than a score built on noise.
The Dampening Factor: Confidence Levels
For players between 270 and 1,800 minutes, a dampening factor is applied that scales linearly from 0.85 (at the minimum threshold) to 1.0 (at full confidence). Players above 1,800 minutes receive the full, undamped score.
Formula: dampening factor = 0.85 + (0.15 x (minutes - 270) / 1,530), capped at 1.0.
Example: A player with 810 minutes played has a dampening factor of 0.85 + (0.15 x 540 / 1,530) = 0.90. If their undamped score would be 74, the displayed score is 66.6 - rounded to 67. This reflects the system's reduced confidence in the smaller sample, not a judgment on the player's quality.
Practically, this means a player returning from injury or a midfielder who has been rotated heavily might show a lower MA-Score than their underlying metrics suggest. The 'Why?' breakdown will show the dampening factor clearly, so users understand exactly why the score appears moderated.
How Penalties Are Treated in the Attacking Score
The Attacking Threat dimension uses xG per 90 - the total Expected Goals from all shots, including penalties (each worth approximately 0.76 xG). Because penalties carry a disproportionate share of total xG, they would otherwise dominate the attacking score for any penalty taker and mask their open-play contribution.
The MA-Score handles this in two complementary ways. First, for strikers specifically, penalties scored per 90 appears as a dedicated metric in the Attacking Threat dimension (15% of the seven-metric attacking set for ST). This isolates and rewards penalty-conversion ability directly rather than letting it inflate the general xG figure by proxy.
Second, across all attacking groups, xG is only one of several Attacking Threat metrics. For ST, for example, goals (25%), xG (20%), shots on target (12%), shots total (10%), hit woodwork (8%), and big chances missed inverted (10%) all carry meaningful weight alongside penalty scored (15%). A striker whose total xG is inflated by penalties but whose underlying open-play shooting is weak will see this reflected in the lower weights on goals-per-90 relative to xG, and in the shots-on-target and shots-total sub-metrics.
The result is a defensible methodology that does not require stripping penalties out entirely: penalty conversion is real footballing value, and the score system rewards it - it just does not pretend that high-xG penalty kicks are equivalent to hard-won open-play chances.
MatchAnalyzr Tip
The gap between a player's Season Score and Form Score is one of the most actionable signals in MatchAnalyzr. A striker with a Season Score of 61 but a Form Score of 78 is in the middle of a genuine run of form - their recent performances are significantly above their season average. For fantasy managers, this is the player to target before the next gameweek.
Season Score vs Form Score
Every player in MatchAnalyzr has two MA-Scores displayed simultaneously: the Season Score and the Form Score. Understanding the difference between them - and the information in the gap between them - is one of the most powerful analytical tools in the system.
The Season Score uses all matches in the current season, updated daily. It is the definitive long-term assessment of a player's quality relative to their position peers. Because it incorporates the full sample, it is stable - a single outstanding or poor performance barely moves it. When evaluating a player's true level for scouting or transfer analysis, the Season Score is the right number.
The Form Score uses only the last 5 matches with exponential decay weighting. More recent matches have greater influence: weight = e^(-0.1 x days since match). A match played three days ago influences the score far more than one played 30 days ago. The Form Score is volatile by design - it reacts quickly to genuine runs of form. For players, the Form dimension combines result-based performance, xG-Momentum (is the player's xG per 90 trending up or down across recent matches?), and for defenders and goalkeepers, xGA-Momentum (is the team's defensive xG conceded improving while this player is on the pitch?).
The gap between Season Score and Form Score is itself informative:
- Form much higher than Season: a player on a significant upward trend - perhaps returning from injury, settling into a new system, or hitting a purple patch. A forward in this situation is worth targeting in fantasy football or monitoring for a potential breakout.
- Form much lower than Season: a player in a dip - possibly fatigued, dealing with a minor knock, or going through a difficult spell. Context matters, but this signal is worth investigating.
- Scores aligned: consistent performance, no major recent deviation from the season-long trend.
Both scores are updated daily, recalculated automatically overnight.
MatchAnalyzr Tip
A player returning from a long injury will have a dampened MA-Score until they accumulate sufficient minutes. Don't dismiss a talented player because their score looks low in October. Check the 'Why?' breakdown - if the dampening factor is the explanation, the underlying per-90 metrics may tell a more positive story than the headline number suggests.
The Colour System: Reading Scores at a Glance
Player MA-Scores are colour-coded throughout MatchAnalyzr to make interpretation immediate. The same five-tier system used for Team MA-Scores applies to all player ratings:
- 75-100 Strong (Teal): An elite player at their position in the league. One of the best in the division across their role's measured dimensions.
- 55-74 Above Average (Emerald): Significantly above the position median. A consistent performer - typically a key player for a competitive side or an established international-calibre footballer.
- 40-54 Average (Amber): The median band. A score of 50 is literally the position median. Players here are performing as expected for their level and role.
- 25-39 Below Average (Orange): Underperforming relative to position peers. A player in this range is struggling to meet the standard of their peer group - which may indicate form issues, system mismatch, or genuine quality concerns.
- 0-24 Weak (Red): Significantly below the position average. One of the weaker performers in the league for their position group.
The colour thresholds are configurable in the admin panel and are applied consistently across every widget, badge, and report in MatchAnalyzr.
Transparency: The 'Why?' Link
Every Player MA-Score displayed in MatchAnalyzr has a 'Why?' link. Transparency is not a feature - it is the entire premise of the MA-Score system.
Hovering over the 'Why?' link shows a tooltip summarising the main drivers: for example, 'High xG per 90 (81), strong shooting accuracy (76), big chances conversion above median (68)'. This converts the number into a sentence without requiring any additional navigation.
Clicking the 'Why?' link (available to Pro and Premium users) opens the full score breakdown:
- The score for each metric within the position group
- The raw per-90 value for each metric
- The Z-score for each metric (how far above or below the position median)
- A comparison bar showing where each metric sits relative to all players in the same position group
- The playing time dampening factor, if applied
- Whether the Form Score is diverging significantly from the Season Score, and by how much
This level of detail is not replicated by any competitor at launch. SofaScore will not show you why a player scored 7.8. WhoScored will not explain their weights. The MA-Score is explicitly designed to make you a better analyst by showing every step of the calculation.
Who Can Use the Player MA-Score?
The Player MA-Score is available on Pro and Premium plans. Free users can see that a player has a MA-Score widget on a dashboard, but the score itself is blurred with an upsell prompt.
Access by plan:
- Free: Player MA-Score widget visible but blurred. Season Score and Form Score not accessible.
- Pro: Full access to Season Score, Form Score, and the 'Why?' tooltip. Score widgets available in dashboards. Players can be added to the watchlist up to the Pro watchlist limit.
- Premium: All Pro features plus the full 'Why?' breakdown with per-metric comparison bars, dimension sub-score display, and historical score trends. Access to up to 10 seasons of historical data for long-term player development tracking.
The Player MA-Score widget comes in three sizes (S, M, L) and can be added to any dashboard. The S size shows the headline score and colour badge. The M size adds the Season/Form split and the top contributing metrics. The L size shows the full metric breakdown inline.
How to Use the Player MA-Score
The Player MA-Score is a tool, and its value depends on how it is applied. Here are the most effective use cases.
For Fantasy Football
Fantasy football rewards points, and points come from goals, assists, clean sheets, and minutes. The Player MA-Score's position-specific breakdown is particularly useful for fantasy managers.
A striker with a high xG per 90 but a low overall MA-Score might be on a team with poor xPTS - meaning they're scoring in games their team is losing. Valuable for goal points, but no clean sheet bonuses elsewhere.
A full-back with an unusually high offensive sub-score (key passes, crosses) is a set-piece and overlap threat worth considering for assist potential.
Use the Form Score to identify players mid-streak - a forward whose Form Score is 15 points above their Season Score is in form right now, not just over the course of the season. Cross-reference with the team's upcoming fixture difficulty for the full picture.
For Scouting and Transfer Analysis
The Player MA-Score's position-specific design is particularly valuable for identifying transfer targets across leagues. Rather than sorting by goals or assists - which heavily favours players in possession-dominant teams with many opportunities - the MA-Score normalises for position and context.
A central midfielder with a CM MA-Score of 74 in Ligue 1 is performing in the top quarter of their position group in France. Adjusted for the Ligue 1 league coefficient (0.88), their cross-league adjusted score is approximately 65 against Premier League peers - still above average, and potentially representing excellent value compared to a domestically rated equivalent.
Use the metric breakdown to understand whether a player's score is driven by the metrics most important to your system. A DM with a high score driven by key passes and final third distribution but low ball recoveries might excel in a possession-based system but struggle in a high-press environment. The breakdown gives you this granularity - not just the headline number.
MatchAnalyzr Tip
When using the Player MA-Score for scouting across leagues, always consider the league coefficient. A winger with a WAM score of 79 in Bundesliga (coefficient 0.95) has an adjusted score of approximately 75 when compared against Premier League players. The comparison widget applies this adjustment automatically - but it is worth keeping in mind when reading raw scores in league-specific widgets.
How the Player MA-Score Compares to Other Systems
Several football analytics products publish player ratings. Understanding how the Player MA-Score differs helps clarify when each system is most useful.
SofaScore and FotMob publish match ratings (1-10) for individual performances. These are useful for recapping a single game but do not aggregate into meaningful season assessments. They reset after every fixture, they don't account for position differences in a rigorous way, and no methodology is published.
WhoScored produces season-average ratings from match ratings. Their methodology is partially disclosed but not enough to reproduce or interrogate the numbers. Ratings skew toward attacking output and are not position-normalised with eight distinct groups.
FBref (StatsBomb) publishes percentile rankings for individual metrics across multiple statistical categories. These are transparent and position-specific, but there is no single composite score - you must interpret across many columns simultaneously. Excellent for deep analysis, but not designed for dashboard integration or quick interpretation.
OPTA does not publish individual player composite scores in a publicly accessible format at the level of MatchAnalyzr's Player MA-Score.
The Player MA-Score's distinctive combination - eight position groups, dual temporal view (Season + Form), per-90 normalisation, xG and position-specific metric sets, playing time dampening, full transparency via 'Why?', and dashboard integration - is not replicated by any competitor at launch.
Frequently Asked Questions
What does a Player MA-Score of 50 mean?
A score of 50 is exactly the position median - not an arbitrary midpoint, but the actual statistical median of all players in the same position group within the same league. Half of all central midfielders (or strikers, or goalkeepers) in that league score above 50, half below. A player at 50 is performing exactly as expected for the median player in their role and division.
Why does a player need at least 270 minutes to receive a score?
Statistical reliability requires a minimum sample size. Two matches is too small a sample for per-90 metrics to be stable - a single strong performance or a poor game would dominate the calculation and produce a score that doesn't reflect true ability. 270 minutes (approximately 3 full matches) is the minimum threshold. Players below it display 'Insufficient data' rather than a misleading number.
How are penalty goals and penalty xG handled in the attacking score?
The MA-Score uses total xG (including penalty xG) as one input in the Attacking Threat dimension, but xG is never the only metric. For strikers, penalties scored per 90 appears as a separate metric (15% of the seven-metric Attacking Threat set for ST), which isolates penalty conversion ability rather than letting it inflate the general xG signal. Alongside goals, shots on target, shots total, hit woodwork, and big chances missed (inverted), the striker score captures open-play quality as well as penalty performance without pretending they are equivalent.
What is the difference between the Season Score and the Form Score?
The Season Score uses all matches in the current campaign and is the definitive long-term assessment of a player's quality. It is stable and resistant to single-game noise. The Form Score uses the last 5 matches with exponential decay weighting - more recent matches count more. It reacts quickly to genuine form runs or slumps. The gap between the two scores is informative: a Form Score significantly higher than the Season Score suggests a player on the rise; a significantly lower Form Score suggests a player in a difficult spell.
How often is the Player MA-Score updated?
Both the Season Score and Form Score are updated daily, recalculated automatically overnight. After each matchday, scores are recalculated overnight so updated ratings are available the following morning. Players who did not feature in recent matches will see their scores updated if their position peers played - because the peer group comparison changes as others accumulate new data.
Can I see what went into a specific Player MA-Score?
Yes - every Player MA-Score has a 'Why?' link. Hovering shows a tooltip with the main score drivers. Clicking (Pro and Premium) opens the full breakdown: each metric's raw per-90 value, Z-score, position-group ranking, and a comparison bar showing the sub-score for each dimension. The playing time dampening factor is shown if it was applied. Premium users additionally see historical score trends across the season.
Is the Player MA-Score available on the Free plan?
The Player MA-Score widget is visible on Free but the score is blurred with an upsell prompt. Full access to Season Score, Form Score, and the 'Why?' tooltip is available from the Pro plan. The full score breakdown with per-metric comparison bars, dimension sub-scores, and historical trends is a Premium feature.
Your football.
Your analysis data.
Your dashboards.
Turn raw data into real insights with MatchAnalyzr. Build your own personalised football dashboard with the leagues, teams and players you actually follow.